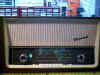
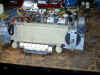
 Four
bands Four
bands |
FM,
AM, SW and Long wave with phono pickup and tape recorder input. |
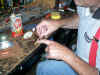
 This is a big radio.
 |
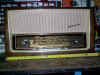
 Six
speakers Six
speakers |
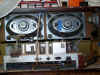 |
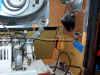
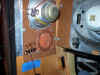
 Similar
to Grundig. Space for new electrolytic under chassis. Similar
to Grundig. Space for new electrolytic under chassis. |
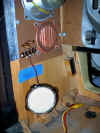
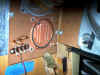
 That is NOT rust on the dial scale reflector.
 |
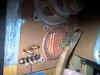
 Mark
the electrostatic leads. Mark
the electrostatic leads. |
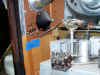 |
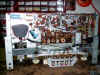
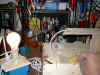
 Bench
disassembly. Twist lock tabs. Bench
disassembly. Twist lock tabs. |
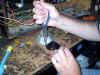
 Be
Gentle. Open up the assembly. Be
Gentle. Open up the assembly. |
 There is the deteriorated foam. It turns to crumbs when touched.
Brush it off.
There is the deteriorated foam. It turns to crumbs when touched.
Brush it off. |
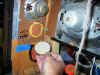
 Gently
remove the diaphragm. Gently
remove the diaphragm. |
 Mark up a new section of foam rubber.
 |
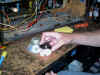
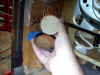
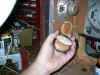
 Clean the tarnish from the press fit contact points.
 |
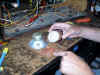
 Clean
the diagram contact point only. You can rub off the metal leaving
unconductive plastic. Clean
the diagram contact point only. You can rub off the metal leaving
unconductive plastic. |
 I rebuilt the left side tweeter in the cabinet.
 |
 |
 'Brush off the old foam rubber.
 |
 Insure it is clean no rust.
 |
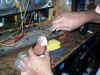
 Separate the insulator and the diaphragm.
 |
 Hot wire cut a new ring of foam. The 100w lamp is in series with a length
of salvage wire wound resistor wire.
Hot wire cut a new ring of foam. The 100w lamp is in series with a length
of salvage wire wound resistor wire. |
 |
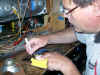
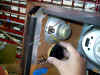
 Use rubber cement to secure the new ring.
 |
 Glue a little square of foam rubber opposite of the lead wire contact to
insure good contact with the diaphragm.
Glue a little square of foam rubber opposite of the lead wire contact to
insure good contact with the diaphragm. |
 Reassemble the diagram lining up the area that you cleaned with the
contact.
Reassemble the diagram lining up the area that you cleaned with the
contact. |
 Push it all back together.
 |
 Twist lock the tabs.
 |
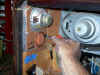
 Alligator clip lead the tweeters to the chassis for a test! Check you
work. You will not hear overwhelming treble like modern
tweeters. The German engineers designed this tweeter to compliment
the whole acoustic compliment.
Alligator clip lead the tweeters to the chassis for a test! Check you
work. You will not hear overwhelming treble like modern
tweeters. The German engineers designed this tweeter to compliment
the whole acoustic compliment. |
|
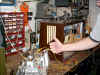
Looking good. Sounding great. |
|
|
|
|


