Mainly Neat Stuff --> Vintage Macintosh --> 400KB Floppy Drive Maintenance
|
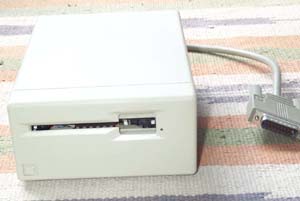
The 400KB single-sided floppy drive was first used by Apple in the Lisa following the failure of the Lisa's original 5.25" "twiggy" drives. It was subsequently used in the original compact Macintoshes (the 128 and 512K); later Macintoshes (Mac Plus, 512Ke and onwards) used an 800k double-sided floppy drive although some models can use the external 400KB drive. The 400KB drive is generally reliable but the grease used on the auto-insert and eject mechanism dries out which causes floppy disks to jam. Relubricating the mechanism usually cures this. The external drive, shown opposite, is identical to the internal drive. Removal of the internal drive is straightforward if you are familiar with working on compact Macs or the Lisa. For instructions on opening a compact Mac, search on the web for the Classic Mac FAQ. |
|
|
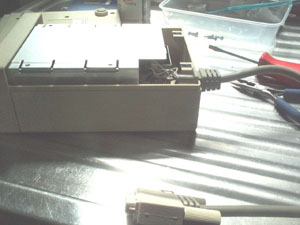
To open an external drive, turn it over and remove the six screws on the underside. The original screws have a slot head with a circular cut out in the centre. They can be a bit fiddly to rmove so use a good quality screwdriver. The two parts of the enclosure are easy to separate. Do not use a screwdriver to prise the two halves as this will damage the plastic. Unhook the cable from the case and extract the drive mechanism complete with the internal aluminium shield/enclosure. The drive cable can now be removed. The connector is keyed so it can only be inserted one way. With the cable removed, slide the drive mechanism out of the aluminium enclosure. |
|
|
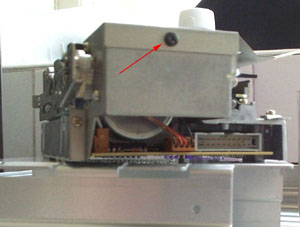
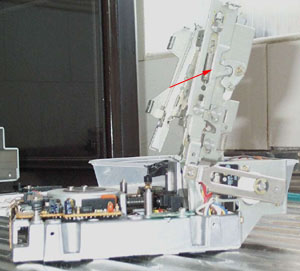
A screw at the back of the mechanism secures the top plate. Remove the screw and slide the top plate off. Note how the top plate hooks into the disk eject/insert mechanism. |
|
|
Turn the drive over. Remove the four screws indicated which hold the disk eject/insert mechanism onto the drive body. Do not remove any other screws. The disk eject/insert mechanism is now "free". Take care when you turn the drive back over. |
|
|
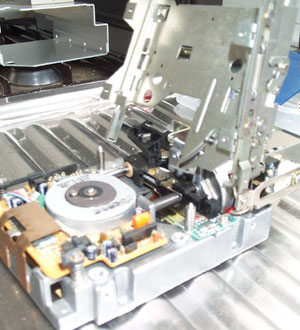
The disk eject/insert mechanism can now be worked loose from the body and tilted back. Make a note of the position of the plastic carrier for the felt disk pressure pad. You should not need to force the mechanism open. Treat it gently. You should now be able to see dried grease on the disk eject/insert mechanism. The grease looks like brown or orange wax. I use a cotton bud dipped in methylated spirit to clean up the grease. You should also see grease on the worm gear that moves the disk head in and out. The drive head operates on the underside of the floppy disk; facing it is the felt pressure pad. Grease on the worm gear may have dried out completely if the drive has not been used recently and, even on a working drive, it will be a black sludge. Take care when cleaning up in this area and avoid touching the disk head or the pressure pad. It's a good idea to shield the drive head with a small fragment of kitchen roll in case of accidents. You will never clean up all of the grease on the worm gear but do your best. |
|
|
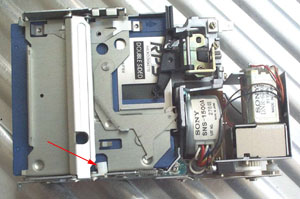
You can now relubricate both the gear and the eject/insert mechanism. The best lubricant is a silicon spray or grease; some people say that you shouldn't use WD-40 or a petroleum based lubricant which might damage plastic components. Whatever lubricant you use, don't spray it directly onto the drive. Squirt it onto a cotton bud and apply it directly where it is needed. Only a few drops are required. One particular area for attention is indicated by the arrow in the image opposite. The slider mechanism needs to be clean and well lubricated both internally and externally. Brush any dirt from the felt pressure pad using your fingernail. Remove the kitchen roll shielding the drive head. Clean the head using a clean cotton bud dipped in drive head cleaner or the cleaner used for tape recorder heads. Methylated spirits or similar is also suitable at a pinch.
|
|
|
Slide the disk eject/insert mechanism back into place, making sure that you put the carrier for the disk pressure pad back correctly. Insert a floppy disk -- not one that contains important data! The disk should slide in easily and slip downwards into the operating position. Eject the disk by pressing on the manual eject lever -- the bit of metal that you normally poke with a paper clip when a disk is stuck in the Mac. The lever is on the right of the disk when viewed from the front. The disk should eject without difficulty. Insert and eject the disk a couple of times. You should never need to force the disk. If there are still problems, you probably haven't lubricated the slide mechanism fully. The area to pay attention is underneath the head of the arrow in the picture opposite. If the drive is used in an unlubricated state for a long time, the white plastic rocker indicated opposite will wear or break off completely. When the drive seems to be working OK, take a quick look round, Clean up any excess lubricant. |
|
To reassemble the drive:
Maintenance of the 400KB floppy drive is covered in the "Apple Lisa / Macintosh XL Do-it-Yourself Guide" published by Sun Remarketing. PDF and HTML copies of the guide can be found on the internet.
Daniel King has an excellent guide for curing the "repeating click of death" which affects more severely worn drives.
A photographic comparison of the mechanisms found in my Lisa 2 and a Mac 400KB external drive has recently been added.
Copyright information: If you wish to use any images on these pages, please contact the author, Phil Beesley on beesley@mandrake.demon.co.uk.