Mainly Neat Stuff -->
Resources --> Repairing Broken
Keycaps
Repairing Broken Keycaps
Keyboards are easily damaged during transport and most of us have
opened a box to discover a couple of keycaps rattling at the bottom.
This is a mild annoyance if the keyboard is a popular one for a Mac
or PC as a replacement keyboard or keycaps can be cheaply purchased.
For damaged caps on an unusual keyboard (like the 1980's Sony word
processor one on this page), the only option is to repair them.
Older keyboards use mechanical switches and occasionally the
entire switch is broken. Repair requires that the keyboard is
disassembled, the broken switch is unsoldered and a replacement is
soldered in place. Complete switches are still available from
enthusiasts for popular computers such as the Apple II. For less
popular computers, a replacement switch can often be salvaged from a
broken keyboard from a similar vintage computer. I'm afraid you'll
have to do your own homework on locating replacement key switches and
disassembling your keyboard. As an example, Tom Lee provides a great
explanation of how to replace the switches
in a Mac Plus keyboard (PDF, 104KB).
|
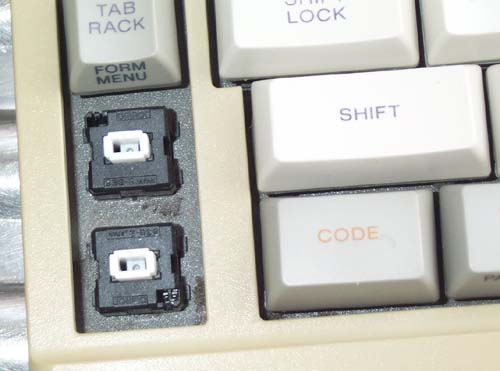
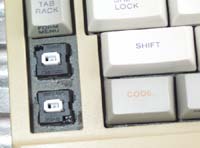
Assuming that the key switch itself is undamaged, you'll
commonly find that the plastic stem of the keycap has
snapped off. The photo opposite shows the socket in the key
switch into which the keycap stem is inserted. The socket in
this case is about 4mm by 1.5mm in cross section and about
4mm deep.
Extracting the broken stem from the socket requires care
and you should use the best quality tools that you own or
can borrow. Often you can use a good pair of needle nosed
pliers to grasp the remaining bit of stem and pull it out.
If that fails, try a better pair of pliers! If none of the
broken stem projects from the socket, you might have to
drill out the remains. Whatever you do, take care not to
damage the switch.
|
|
|
Even if you can extract the broken half of stem, don't
kid yourself that you can glue the keycap back together --
it'll fall off again after a few day's typing. With a vice
and a few hand tools, you can make a replacement stem in a
few minutes.
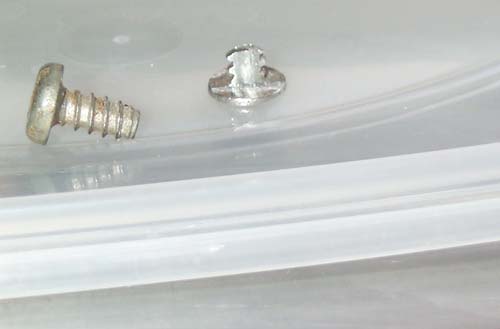
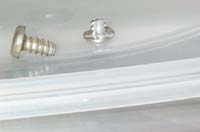
Select a metal or plastic screw that has the same tip
diameter as the widest part of the key switch socket. Cut
the screw to the required length and file two parallel flat
sides until it will fit into the key switch socket with
relative ease. Don't worry about the serrations -- they will
help to hold the new stem in the socket. If the new stem is
a loose fit in the socket, file a few burrs on the flat
sides.
Finally, remove as much material as you can from the head
of the screw. 0.5mm is a good head thickness to aim for.
|
|
|
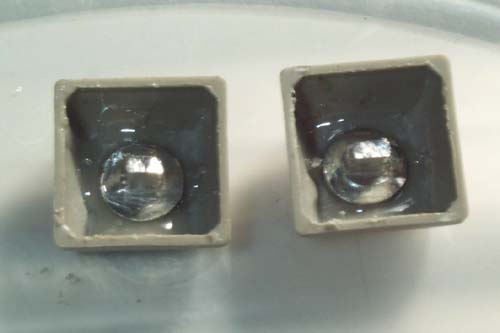
Remove any remaining bits of stem from the underside of
the keycap. Ensure that the replacement stem sits
evenly.
Now for the difficult bit... After the stem is glued to
the underside of he keycap, any misalignment will be
magnified when the keycap is refitted. Use a glue that
allows you a few minutes to adjust the location of the new
stem and use a thin layer so that the height of the keycap
isn't affected too much. I recommend using an epoxy glue
that won't react with the plastic keycap.
|

|
|
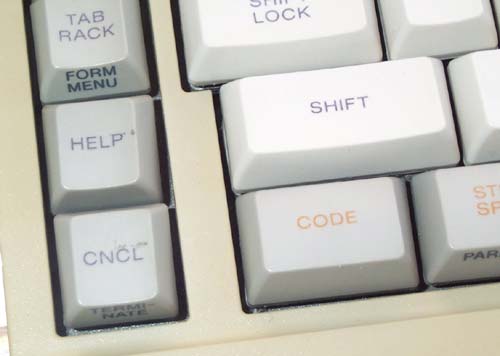
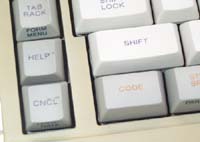
Even though I'd taken a lot of care when gluing my stems
to the keycap, I was a few degrees out of parallel. The
misalignment is clear in the close up photo opposite
although the repair is hardly noticeable when you look at
the keyboard in its entirety.
|
|
Copyright information: If you wish to use any images on these
pages, please contact the author, Phil Beesley on beesley@mandrake.demon.co.uk.