BX998A


Home Up BD563A BOX97U BX553A B7X63A B8X72A BX998A


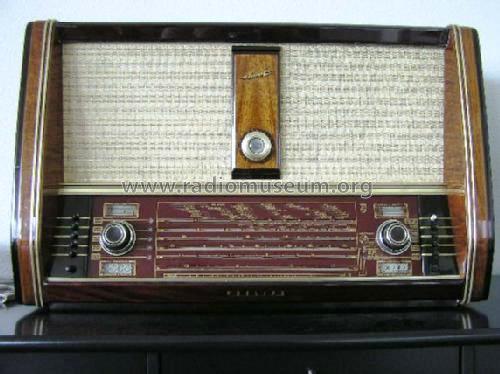
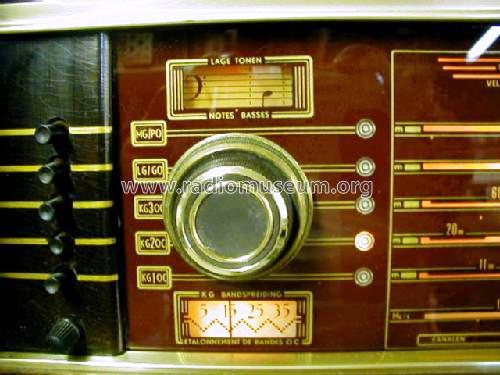
Philips BX998A Bi Amp Table Radio.


The restored unit

IMG_4831.JPG (2651953 bytes) IMG_4832.JPG (273304 bytes) IMG_4833.JPG (210409 bytes) IMG_4834.JPG (198338 bytes)  
IMG_4835.JPG (238564 bytes) IMG_4836.JPG (241670 bytes) IMG_4837.JPG (232666 bytes)    


Logo needed for refinishing of the cabinet.  PHILIPS foil decal LOGO.jpg (60133 bytes)  click on image to enlarge.


I gave up trying to find one of these brass logo emblems.  See here what I did to make one. 

IMG_4703.JPG (367546 bytes)


This is a large heavy radio. bi_ampli_bx998a_211327.jpeg (35271 bytes)

 This picture from www.Radiomuseum.org.

bi_ampli_bx998a_684493.jpeg (36511 bytes)

There is a motor driven set of function switches. 

IMG_4452.JPG (104536 bytes)

All hardware has been removed from the cabinet for restoration.  

IMG_4446.JPG (105089 bytes)

That is inlayed brass.

IMG_4420.JPG (116122 bytes) IMG_4433.JPG (116780 bytes)
IMG_4447.JPG (133243 bytes) IMG_4419.JPG (133414 bytes) IMG_4428.JPG (136349 bytes) IMG_4435.JPG (139149 bytes)

This finish will be stripped.  Any original stain will be maintained. 

IMG_4449.JPG (140716 bytes)

Faded stain will be color matched and blended.  

IMG_4440.JPG (149615 bytes)

I am glad this is not a decal.  

IMG_4423.JPG (152180 bytes)

I have to re-string this antenna turning cord.  

IMG_4422.JPG (152523 bytes)

That is why there are plenty of pictures.  I do have the diagram but pictures are hard to beat.

IMG_4425.JPG (156708 bytes)

You can see the faded color from the years of light exposure. It looks nice light but the dark is the original color. 

IMG_4418.JPG (157981 bytes) IMG_4448.JPG (158401 bytes) IMG_4421.JPG (160028 bytes)
IMG_4450.JPG (162532 bytes) IMG_4427.JPG (163949 bytes) IMG_4426.JPG (167014 bytes) IMG_4436.JPG (169887 bytes) IMG_4431.JPG (197160 bytes)

I was delighted with the whole works slid out on a wood board!

IMG_4414.JPG (199876 bytes)

Preliminary testing revealed a strong hum that faded slightly.  This will be remedied with the chassis restoration. 

IMG_4432.JPG (200570 bytes)

The diode tubes will be tested.  And of course all electrolytic capacitors will be replaced too.

IMG_4434.JPG (203185 bytes) IMG_4424.JPG (210146 bytes) IMG_4430.JPG (210575 bytes) IMG_4429.JPG (230128 bytes) IMG_4415.JPG (333288 bytes)
IMG_4416.JPG (354305 bytes) IMG_4413.JPG (358289 bytes) IMG_4417.JPG (370186 bytes)      

Find the service document here.


IMG_4826.JPG (212203 bytes) IMG_4827.JPG (194960 bytes) IMG_4830.JPG (170424 bytes)      


Hit Counter

 Contact me including your thoughts and comments. 

Please see the LINKS page.  I have collected many resources over the years.

135,912 unique web site visitors (14,499,000 hits) from October 2004 through August 2011.

Copyright © 2004 - 2012. All rights reserved.