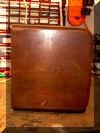
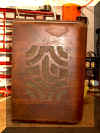
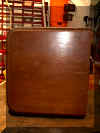
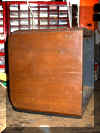
This Zenith 6-S-222 is in for restoration. This table top black
dial radio is good condition. The chassis will receive the complete
restoration and the cabinet will receive attention too.
All speaker coils, oscillator coils and transformers have been ohmed out and
show good cold resistance. The volume control seems good
electrically. It will need to have a key inserted through a chassis hole
to keep it still. Not using a chassis hole key is probably why the nut
worked loose.
Here are some pictures.
 This unit survived shipping being wrapped and insulated with
paper. No apparent damage is observed.
 |
 It was double boxed and insulated between boxes with paper. Grill
cloth may clean up a bit and should be usable.
 |
 I
prefer generous wraps of big bubble, bubble wrap and thick cardboard
shipping container. I
prefer generous wraps of big bubble, bubble wrap and thick cardboard
shipping container. |
 I prefer four inches of space from the cabinet to the inside of the
box.
 |
 the
wraps of bubble wrap take up the space and provide insulation. the
wraps of bubble wrap take up the space and provide insulation. |
 |
 |
 |
 Good. Good. |
 Some
parts have been replaced over the years. Some
parts have been replaced over the years. |
 The
volume control nut is loose. This is a universal replacement
control and may need replacing if the key does not hold. The
volume control nut is loose. This is a universal replacement
control and may need replacing if the key does not hold. |
 Tuning
drive belt will be replace with custom cut belt material. Tuning
drive belt will be replace with custom cut belt material. |
 This
pointer has been soldered to the shaft. This
pointer has been soldered to the shaft. |
 After
de-soldering, this indicator may not be original or lost an
insert. More research to do. The dial scale is in excellent
condition. After
de-soldering, this indicator may not be original or lost an
insert. More research to do. The dial scale is in excellent
condition. |
 Lamp shades will be replace or the bulbs will do to the dial scale what
they did to the shades.
 |
 |
 |
 |
 |
 |
 |
 |
 |
 |
 |
 |
 |
 |
 |
 |
|
|
|
| Finished Radio. There is a
minimum of eight (8) coats of clear lacquer on this original
stain. |
 |
 |
 |
 |
 |
 |
 |
 |
 |
|
|
|
 |
 |
 |
 |
 |
 |
This is the restored cabinet. The left and right side veneer
developed separation and lifted from the base.
The left side (facing front) veneer has been removed and replaced with new
African Mahogany. The Right side lifted area had wood glue injected under
the veneer between the grain. I used a professional high strength water
resistant glue. The new mahogany was stained, grain filled and toned to match
the original hue. Several coats of Minwax finishing past wax was applied.


