Grebe


Home Search Aetna Airline Atwater Kent. Bendix Blaupunkt Bogen Bowers Breting 14 Bulova Crosley Delco Dentron Electro-Neutronics Emerson Emud Fairbanks Morse Grant, W. T. Grebe Grundig Grunow Hammarlund Hallicrafters Heathkit Henry Hickok 288X Howard Howard Johnson Jesse French Johnson Korting Lafayette Lap Amp Motorola NAD National. Nordmende Norelco Packard-Bell Perpetuum-Ebner PHILCO Philips PYE P35 RCA Robyn T-123B SABA Silvertone 4663 Standard A Stewart Warner Telefunken Triplet 3436 vhf gen Wagner Walgreen WEGA Westinghouse Yaesu ZENITH Links Audio Reinforcement Antenna Cabinet Finishing Capacitor stuffing Comments Dial Scales Dim Bulb Tester Electrodynamic Electrostatic Elmer is his name. Etching Emblems IF Transformers Lead Twister Leakage Tester Packing Tips Resistors Rodent Damage Shiny Chassis Slides & Presentations Tube Analyzing Vendors Laptop


DSCN0365.JPG (855508 bytes)  This is the finished unit with its speaker. 


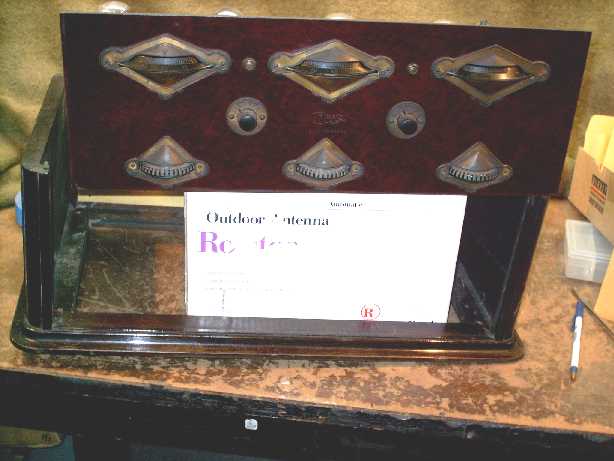
This is a Grebe Syncrophase MU-1 in for restoration.  Below are some pictures of the disassembly process. 

IM000001.JPG (1004938 bytes)

Get ready. .

IM000008.JPG (873060 bytes)

Label everything.

IM000009.JPG (721412 bytes)

Some liquid got into the hinge.

IM000010.JPG (723451 bytes)

Use a box to support the chassis.  Slip the case down and off.

IM000013.JPG (475792 bytes)

Label everything

IM000029.JPG (465159 bytes) IM000014.JPG (1007253 bytes) IM000017.JPG (1163639 bytes) IM000020.JPG (1035547 bytes)  
IM000046.JPG (731468 bytes)

Removal of components and wires. 

IM000048.JPG (798963 bytes)

Label everything.

IM000051.JPG (777205 bytes)

And label the printed picture too.

72.JPG (215147 bytes) 74.JPG (208789 bytes)
IM000093a.JPG (218269 bytes) Denatured alcohol is used to clean the shellac covered cloth insulation.  IM000096.JPG (862601 bytes) 

A tooth brush with alcohol is used to scrub the bundle.

IM000098.JPG (750586 bytes) Brass brush the wire shiny.  IM000100.JPG (180516 bytes) IM000098.JPG (183037 bytes)
IM000101a.JPG (85516 bytes) Careful heating on low setting releases the wax.   IM000103.JPG (184496 bytes)

B+ Bypass condenser

IM000104.JPG (210432 bytes) These caps are replaced.  I would not want 90 or 135 volts on the old paper insulators.  IM000105.JPG (200761 bytes)

C+ bypass condenser.

A little hot melt glue will adequately seal up these capacitors.  The tin exteriors, not shown, are receiving a sprits of gloss black and a shellac top coat.   I will save the original internals in case an owner would like an authentic non functional 1920's cap. 


Time for the front panel mounted components.


IM000107.JPG (882544 bytes) Shot of the left side IM000106.JPG (921047 bytes)Shot of the right.  These will held reassembly IM000108.JPG (481927 bytes) Capacitors labeled where no one will see when reassembled.  IM000110.JPG (564551 bytes) Yuk the dirt. IM000114.JPG (253125 bytes)

There is gold under the coal black dirt in the numbers!  I will be making a trip to the hobby shop to find proper gold paint for the restoration of the engraved lettering!

IM000113.JPG (807880 bytes) You can't see it here but there is gold in the engraved Grebe logo too! capcan.JPG (171473 bytes) Repainted cap cans.  IM000115.JPG (566890 bytes) Those appear to be silver contacts.  Shined up with a little brushing and Tarnex.   I will use the Tarnex on the bare wire.  It makes it shiny silver again.  Wire brushing only takes off the decades of crusted dirt.   


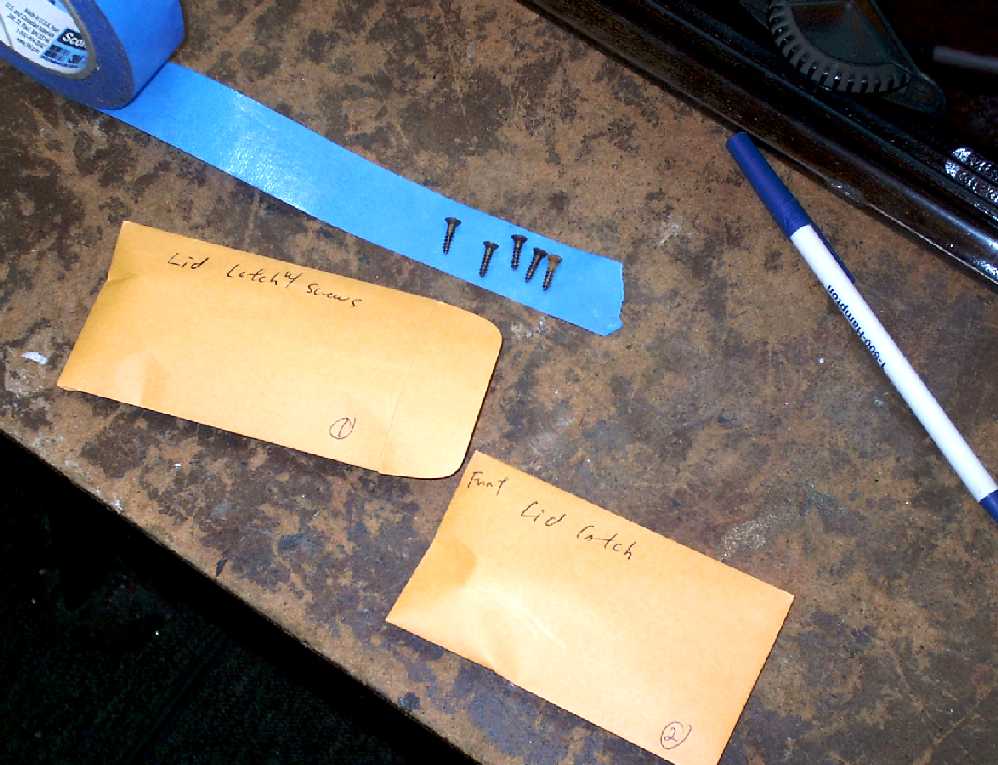
Restoring front panel details.


IM000114.JPG (253125 bytes) IM000160.JPG (257660 bytes) IM000157.JPG (243855 bytes) IM000167.JPG (1097729 bytes)
IM000166.JPG (219925 bytes) IM000168.JPG (110606 bytes)    


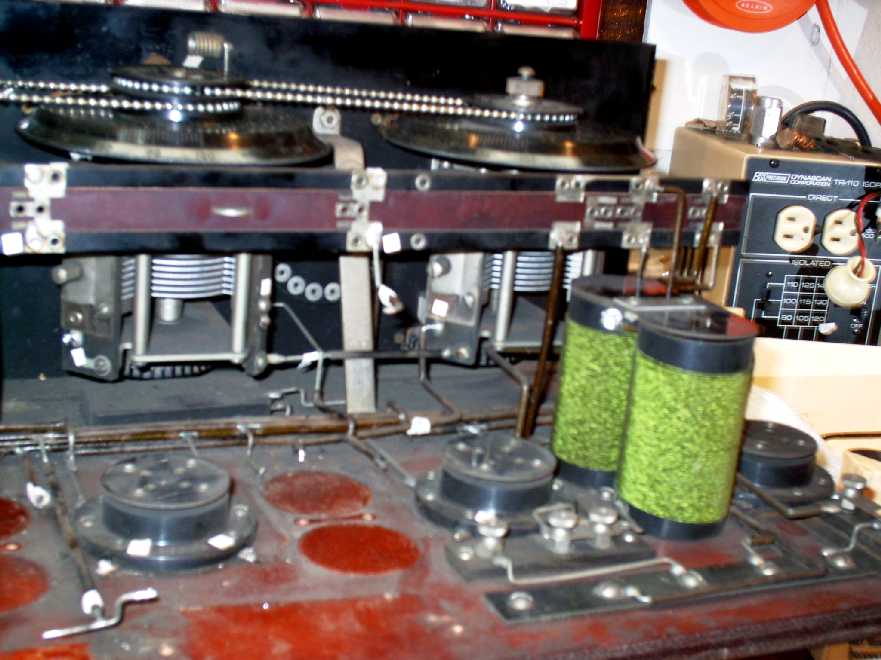
Most of the Disassembly is complete.  now for cleaning and restoring some finishes. 

Clean and restore the bread board.

TEST 177.jpg (317920 bytes) Mineral spirits does not dissolve the finish.   78.jpg (424089 bytes)

Cleaning with Mineral spirits.

79.jpg (384589 bytes)

OOoooh! Nice.

Test 280.jpg (239161 bytes)

Alcohol DOES dissolve this finish.  It is Shellac.

83.jpg (197217 bytes) After Steel wool and a bit of careful buffing with Alcohol. I shut down the shop/shack and went to Lowes to pick up some 3# precut shellac.  I will cut this to 2# for many thin coats.  I would not want to overbuild the missing spots. IM000092.JPG (549517 bytes) 

OOooh that's Nice!


Clean and consider what to do with the lid.

IM000116.JPG (1143132 bytes)

This is pretty badly chipped. I suspect reflowing will not work.

IM000118.JPG (482716 bytes) 


Dings and dents.

IM000119.JPG (448817 bytes) IM000120.JPG (895119 bytes) Not Shellac. That is dirt on the cloth.  Most likely cigarette smoke residue.  IM000122.JPG (925493 bytes) Paint thinner did not dissolve  the finish.
IM000123.JPG (868020 bytes) Mineral spirits a no go. IM000125.JPG (631714 bytes) Yes, Lacquer it is.  Those are tube heat burn marks. 

I thought the whole unit would be shellac as indicated from the bread board.  But lacquer makes more sense for the 1920's vintage. 

   
IM000126.JPG (217305 bytes)Reflowing or re-amalgamating the finish is out of the question.  Too much missing finish. So stripping has been done.  IM000130.JPG (1142058 bytes) Stain is deep and is in good condition.   The hinge is rusted and pitted on one end.  Zoom in on the high resolution (click on this thumb nail) to see the dents.     
IM000133.JPG (903209 bytes) A water soaked cotton swab held on the dent then pressed with a hot soldering iron helps to pop out the dent.  IM000135.JPG (850268 bytes) Repeat this quite a few times to get the most expansion.  The steam will not work where there is missing material. Those spots will be filled before touch up stain and lacquer sealing.

More later...04/02/2007


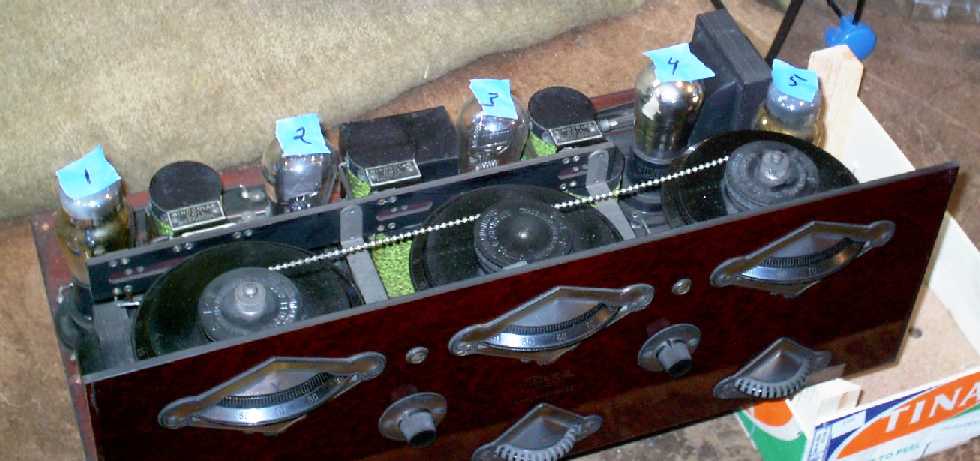
Oh boy! Time to reassemble some parts....

It has been a while since the shop saw my shadow.  But I am back at it now that the weather has warmed a bit.  Oh I was in now and again to touch up the gold lettering.  

I will fill this table in as the radio goes back together.  

IM000182.JPG (884447 bytes)

Each piece has been individually shined up.  Every rivet, every wiper bar and all exposed wire leads have been power buffed. Decades of dirt and oxidation is coming off.  0000 and 00 steel wool and a lot of Dremel cloth and fine wire wheels helped to get in the cracks.  

IM000183.JPG (913332 bytes)

These escutcheons are brass.  No coatings were found.  No tints.  These have been buffed on a bench wheel with progressive polishing compounds.  A light wax coat has been applied to keep the shine. 042507

This is when the labeling comes in handy.  I took a lot of pictures to help reassemble the unit.  Most of the pics are above. I can use the shop computer to blow up the pictures on this page to help locate connections and identifying tags.  If all else fails there is also a schematic.  

This radio is like an Erector Set of old.


Final Assembly.

This is the reassembled fully restored radio.  After 60 hours of labor and a few parts this radio plays and sounds great.

Every nut, screw, bolt, washer, screw, latch, hinge, escutcheon, lamp socket, insulating fabric has been cleaned, polished and buffed to a shine.  The cabinet received sanding sealer and many coats of clear and toning lacquer.  The lacquer is still drying.  The cabinet can be past wax polished after a few good weeks or months so all the coats dry hard. 

The second RF Bi-nocular coil (center) started to arc from a ground rivet to the coil wire carrying B+ 90 volts.  I removed a few turns of wire from where the rivet was contacting the wire, coated the wire with lacquer and rewound the wire back onto the form.  I also snuggled the wires up and away from the grounded rivet creating an insulating air gap.  Again lacquer was applied to the bottom three turns of the offending coil and form base.  Once a day of drying has occurred once again B+ will be applied to the radio and tested. 

Not bad for a radio manufactured in the 1920's.

IM000031.JPG (639888 bytes) IM000030.JPG (1122229 bytes) IM000029.JPG (1079985 bytes)
IM000028.JPG (724714 bytes) IM000027.JPG (736345 bytes) IM000026.JPG (750712 bytes)


Connecting the ABREIII


IM000031.JPG (267511 bytes) IM000032.JPG (1064843 bytes)


 Contact me including your thoughts and comments. 

Please see the LINKS page.  I have collected many resources over the years.

135,912 unique web site visitors (14,499,000 hits) from October 2004 through August 2011.

Copyright © 2004 - 2012. All rights reserved.